

Successful acoustic outcomes don’t happen by accident. They’re the result of clear goals, coordinated teams, and disciplined follow-through from design through installation. For architects, designers, and owners, working with contractors effectively is often the difference between a space that sounds right on day one and a project that requires costly fixes after occupancy.
The stakes are high. Missed acoustic targets can undermine speech intelligibility in offices and classrooms, compromise privacy in healthcare and corporate environments, or create reverberant, uncomfortable spaces in gyms and auditoriums. Beyond user experience, there are real consequences: rework, schedule delays, finger-pointing, and change orders that strain relationships and budgets.
This article lays out a practical playbook for aligning acoustic design intent with field execution – so the specifications you write are the performance you get.
Who Owns What When Building Toward High Acoustic Performance?
Acoustic performance is a shared responsibility, but it works best when roles and decision authority are clearly defined early.
Typical contributors include:
- Architect / Interior Designer – establishes performance goals, integrates acoustic intent into drawings and finish selections.
- Acoustic Consultant – defines room targets, validates assemblies, and advises on testing and mockups.
- General Contractor / Project Manager – coordinates trades, enforces submittal requirements, and manages schedule impacts.
- Field Superintendent – oversees daily execution and verifies that details are built as intended.
- Ceiling, drywall, and specialty subs – install assemblies that directly affect acoustic outcomes.
- MEP trades – influence background noise, penetrations, and flanking paths.
- Product representatives – support product selection, acoustic submittals, and installation guidance.
Clear communication lines matter just as much as clear specs. Everyone should know who reviews acoustic submittals, who approves deviations, and who has authority to say “stop” when a detail compromises performance.

Translating Specs Into Buildable Details
Acoustic specifications only work if they can be built – and built consistently.
Start by grounding the team in the relevant specification divisions: acoustical ceilings and walls, insulation, doors and frames, sealants, and specialty treatments. From there, define performance targets early and explicitly.
For most projects, this includes:
- Partition and floor performance (STC / IIC where applicable)
- Room performance, using metrics like NRC rating for absorption and RT60 reverberation time for overall sound decay
When absorption is specified, be clear that NRC values should be supported by lab testing such as ASTM C423 test data, and require that exact standard in submittals to avoid vague or incomparable claims.
Equally important is detailing to prevent flanking paths. Common trouble spots include back-to-back outlets, slab edges, curtain wall interfaces, unsealed penetrations, door undercuts, and duct or fan paths that bypass rated assemblies. These are small details with huge impact.
A strong submittal plan helps prevent issues before mobilization. Require acoustic submittals that include verified test data, coordinated shop drawings, installation sequencing, and formal product approvals before materials arrive on site.
Bidding and Value Engineering Without Killing Performance
Value engineering acoustics doesn’t have to mean sacrificing results – but it does require discipline.
When evaluating “equal” products, comparisons should go beyond headline numbers. Look closely at lab reports, mounting conditions, frequency breakdowns, backer materials, and allowable tolerances. A panel tested direct-mount on concrete may not perform the same when installed on furring or suspension systems.
Common VE risks include removing decoupling elements, reducing mass, or eliminating seals that control air and sound leakage. These changes may look minor on paper but can fundamentally alter performance.
A simple “ask-for-proof” mindset helps. Questions to keep in mind include:
- What test standard supports the claim?
- Is there a sample detail showing the proposed installation?
- Does the product carry a relevant warranty?
- Are there field references for similar applications?
This approach keeps value engineering acoustics grounded in evidence, not assumptions.

Acoustic Submittals & Shop Drawings: What to Ask For
Effective review starts with knowing what to require.
At a minimum, acoustic submittals should include product data with specified NRC, STC, or IIC claims tied to recognized standards such as ASTM C423 for absorption. Manufacturer information – such as that provided by Oeler Industries, Inc. or comparable suppliers – should be complete and project-specific.
Job-specific shop drawings are equally important. These should show panel layouts, joint and reveal conditions, access panels, hanger or suspension points, and perimeter sealing details. Generic diagrams rarely capture the realities of a specific ceiling or wall condition. One common failure point is accepting overly generic submittals that don’t reflect actual project conditions. Acoustic performance claims should match the proposed installation method, substrate, mounting condition, and backing material – not a best-case laboratory setup that won’t exist in the field. Rejecting placeholder submittals early and requiring resubmission before procurement helps prevent costly substitutions, delays, or performance disputes once materials are already on site.
Installation instructions round out the package. Look for guidance on moisture and temperature conditioning, substrate preparation, and sequencing with MEP and firestopping trades. Coordination here prevents last-minute compromises in the field.
Mockups and First-Work Inspections
Mockups and first-work inspections create a controlled checkpoint between documentation and full-scale installation. A well-executed field mockup allows the project team to verify that acoustic intent, constructability, and sequencing all align before repetition locks in mistakes. Addressing questions at this stage is far less disruptive than correcting systemic issues after ceilings are closed or finishes are complete.
Visual Mockup
Visual mockups confirm aesthetics before full installation and give stakeholders confidence in how the finished system will appear. They’re especially useful for verifying reveals, joinery, slat or perforation orientation, and transitions at edges or penetrations. For acoustical systems, visual mockups also help ensure that access panels, lighting, and diffusers integrate cleanly without undermining the intended design rhythm.
Performance Mockup
A performance mockup is justified when acoustic risk is high or the space is acoustically sensitive. This might include small-room RT60 spot checks, door seal trials, or localized absorption testing to confirm assumptions made during design. The goal isn’t perfection – it’s establishing baseline expectations and confirming that installed assemblies are capable of meeting targets before full build-out.
Installation Best Practices
Even well-designed systems can fail without disciplined installation, especially when acoustic details compete with schedule pressure or trade sequencing. Small deviations – missed seals, compressed backers, or unintended bridging – can quickly erode performance if they are repeated across a project. Clear expectations, early coordination, and consistent field oversight help ensure acoustic assemblies perform as specified, not just as drawn.
Wall & Partition Tips
Field teams should focus on continuous top and bottom seals, correct resilient channel orientation and spacing, putty pads at outlets, and proper use of staggered studs or isolation clips where specified. Missed seals are one of the most common causes of underperforming partitions.
Ceiling Systems
Ceilings demand careful handling. Verify panel orientation, hanger spacing, and perimeter isolation. Coordinate lighting, AV, and HVAC early so fixtures don’t short-circuit acoustic layers or compress backers meant to absorb sound.
Penetrations & Interfaces
Penetrations are where acoustics often unravel. Firestopping and acoustic sealants must be coordinated, with correct backer rod depth and full continuity. Isolation breaks should be protected from bridging by adjacent trades.
Field QA/QC & Acoustic Commissioning
Quality control doesn’t end at installation. Pre-close inspections using an acoustic punch list can catch issues while access is still available.
Field QA/QC is most effective when the right people are present at the right time. Involving the superintendent, relevant trade foremen, and – when appropriate – the acoustic consultant during pre-close inspections ensures that issues are understood and corrected before access is lost. Catching problems above ceilings or within wall assemblies early not only protects acoustic performance, it reduces downstream conflicts and change orders during closeout.
Basic app-based checks for background noise or RT60 reverberation time provide early insight, even when formal testing isn’t required. Where specified, third-party testing validates results and documents compliance.
All deviations – and approved fixes – should be recorded and included in closeout documentation. This protects both the design team and the contractor.

Cost, Schedule, and Risk Management
Some acoustic investments deliver more impact than others. Doors and seals, flanking control, and ceiling treatments in large volume rooms often provide the best return.
Acoustic issues also tend to surface late, when schedules are tight and corrective work is most disruptive. Because fixes often require reopening finished surfaces or reworking coordinated systems, acoustics can quickly become a disproportionate driver of scheduled extensions and claims. Protecting performance early – through clear details, disciplined reviews, and field verification – is one of the most effective ways to manage both risk and cost.
From a schedule standpoint, allow time for material conditioning and for coordination above ceilings. Be aware of common change-order triggers such as late soffit revisions, fixture swaps, or added penetrations that weren’t in the original scope.
Managing these risks proactively keeps acoustics from becoming a downstream problem.
Read More: Top 12 Innovative Ceiling Materials That Are Reshaping Architectural Design
When to Apply the Playbook
Different spaces demand different priorities:
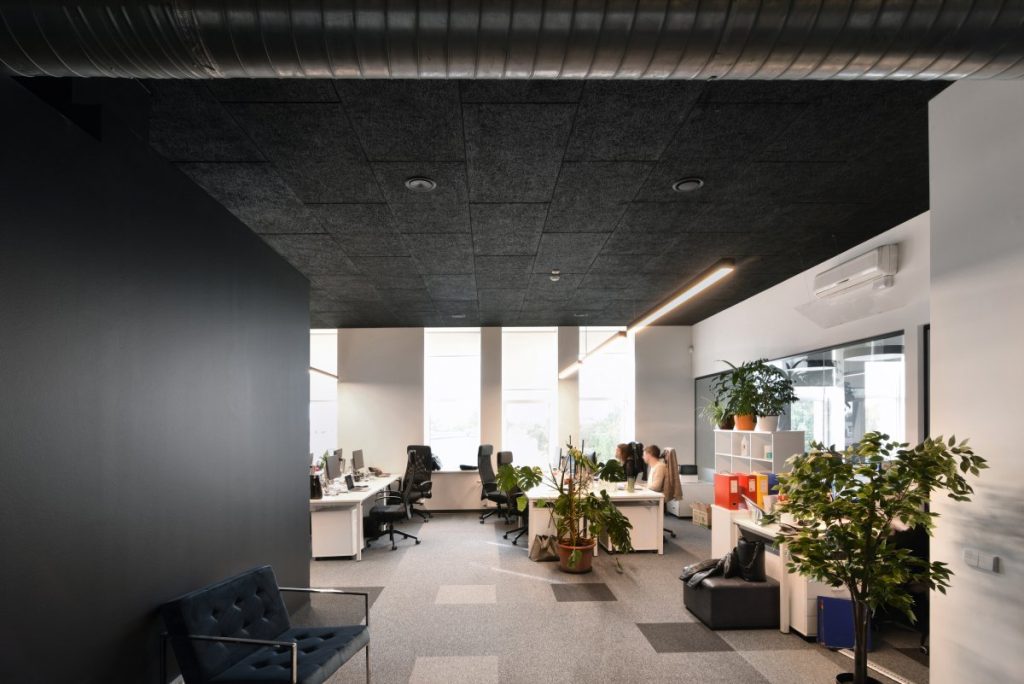
- Open office fit-outs focus on speech privacy, often using acoustical ceiling clouds or baffles to control reverberation time.
- School gyms and cafeterias deal with large-volume reverberation and benefit from durable treatments like wood acoustic panels or fiber systems.
- Auditoriums and multipurpose halls require tight integration of AV, access panels, and serviceability without compromising absorption.
The playbook adapts, but the principles stay the same.
ASI’s Product Selection
ASI Architectural offers field-friendly systems designed to support reliable acoustic outcomes.
- Cloud ceiling panels are available in flat, concave, or convex forms and can be perforated and backed with acoustical material for absorption. They’re ideal for large volumes and design-forward ceilings.
- Audition Acoustical Wood Panels and Planks deliver a linear wood aesthetic with optional acoustical backers for walls or ceilings, using straightforward clip installation.
- Wood Ceilings are available in a range of interior options that balance warmth, durability, and acoustic performance.
- StrandTec® Wood Fiber Acoustic Panels offer a versatile, sustainable solution for walls, ceilings, baffles, or clouds – well-suited to gyms, classrooms, and other high-use spaces.
Lock In Performance Today
Delivering on acoustic intent takes more than good products. It requires clear targets, airtight submittals, disciplined installation, and objective verification – supported by an acoustic performance checklist that keeps everyone aligned.
Most importantly, success depends on working with contractors as partners in performance, not just executors of drawings. When expectations are clear and communication stays open, acoustic goals are achievable and repeatable.
If you’re planning a project and want help aligning design intent with field execution, consult with one of our acoustic specialists to lock in performance from day one.
FAQs
What should I include in an acoustic submittal package?
Verified test data, applicable standards, coordinated shop drawings, and clear installation instructions.
How do I prevent flanking paths during construction?
Detail and inspect seals, penetrations, slab edges, and interfaces before close-in.
When is a performance mockup worth it?
When acoustic risk is high or assumptions need validation before full installation.
Which acoustic products best fit open offices vs. gyms vs. auditoriums?
Open offices benefit from absorption and diffusion, gyms from durable high-NRC systems, and auditoriums from integrated solutions that balance acoustics and AV.
What documentation is needed at closeout to prove specs were met?
Approved submittals, test reports, inspection records, and documentation of any approved deviations.